About This Guide
The User Guide to the Key Features on One IBC's Client Portal is designed to help clients and partners navigate the platform with ease and confidence. It provides a step-by-step overview of the portal's essential tools — from company management and document storage to service tracking and billing transparency.
This guide empowers users to fully leverage One IBC's Client Portal for seamless business management. Whether registering a new company, renewing services, or accessing compliance documents, the portal ensures a smooth and intuitive experience at every step.
With practical visuals, clear instructions, and expert insights, this guide is the ultimate companion for maximizing efficiency through One IBC's Client Portal — your all-in-one business management hub.
View the list of companies and Upcoming Due Date details

Within One IBC's Client Portal, users can easily view all company profiles and upcoming due dates. This feature helps track renewals efficiently and minimize delays.
Create a renewal case for our teammate by clicking "Request," entering the renewal details, and then clicking "Create."
View, upload, and provide feedback on documents
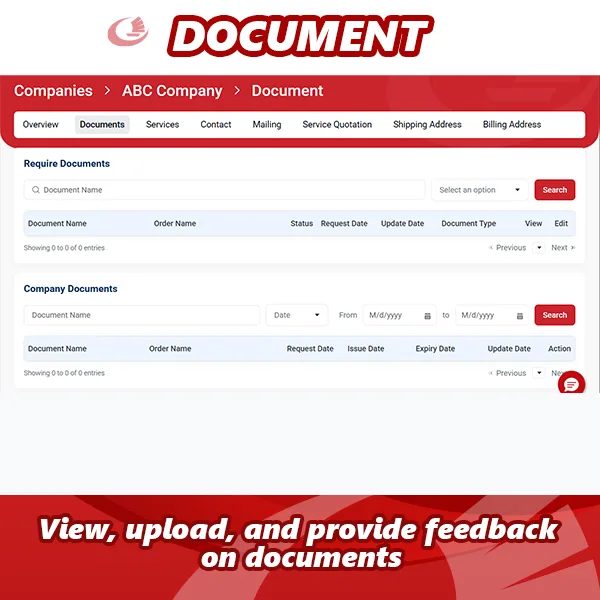
The document management section in One IBC's Client Portal streamlines the exchange of files between clients and the team.
- Step 1: Clients click on the "Documents" tab in the top navigation bar. They can view the list of required documents in the "Required Documents" table and the list of result documents in the "Company Documents" table.
- Step 2: Clients upload the requested documents from our teammate by clicking on the pencil icon.
- Step 3: Clients upload the document by clicking "Upload File" or dragging and dropping the file into the adjacent box. Click "Done" to complete the upload process.
- Step 4: Clients provide feedback on the uploaded documents by clicking the eye icon.
- Step 5: Click "Feedback" and enter the feedback content in the Message box. Click "Confirm" to send the feedback to our teammate.
View the list of purchased services and create new orders
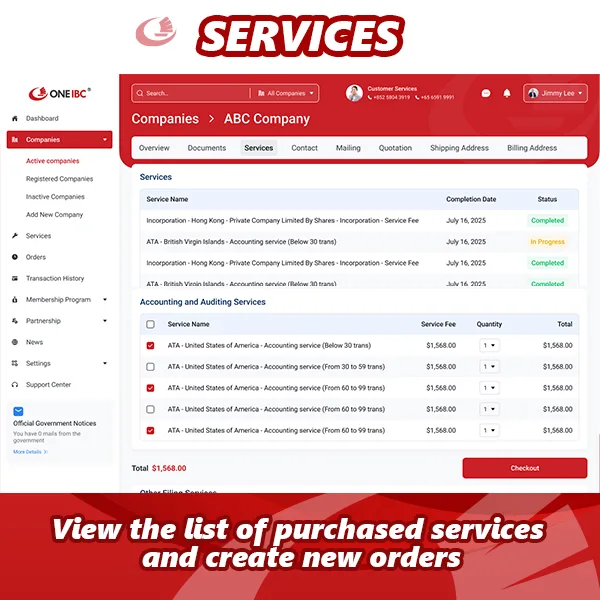
Using One IBC's Client Portal, clients can track their purchased services and conveniently place new orders.
- Step 1: Clients click on the "Services" tab in the top navigation bar to view the list of purchased services for the selected company in the Services table.
- Step 2: Create a new order from the add-on services below the Services table. Select the quantity of products for the services to be purchased.
- Step 3: Click "Checkout" to proceed with the payment for the selected add-on services.
View and provide feedback on mailings
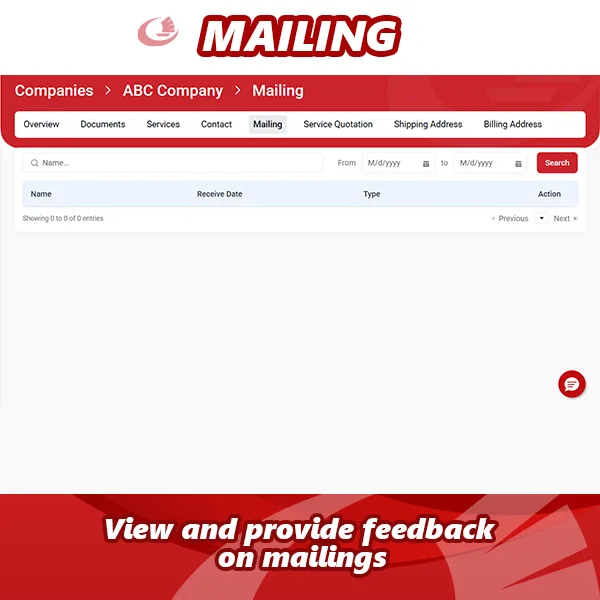
One IBC's Client Portal allows clients to review and respond to mailing activities in one place.
- Step 1: Clients click on the "Mailing" tab in the top navigation bar to view the list of mailings for the selected company.
- Step 2: View the details of the mailing by clicking the eye icon.
- Step 3: Clients provide feedback on the selected mailing by clicking "Feedback," entering a message, and then clicking "Confirm" to send the feedback to our teammate.
Manage shipping addresses, billing addresses, and contact information
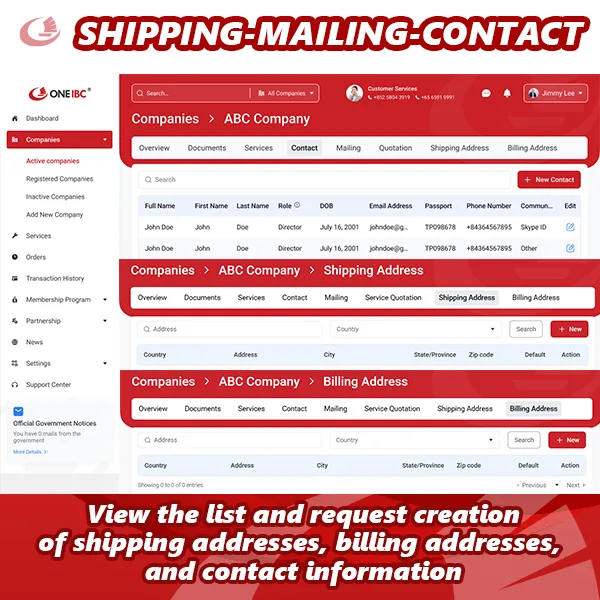
Managing shipping and billing information is simplified with One IBC's Client Portal.
- Step 1: Clients click on the "Shipping Address/Billing Address" tab in the top navigation bar to view the list of shipping addresses for the selected company.
- Step 2: Clients request changes to existing shipping or billing address information by clicking the pencil icon and entering the adjustments. Then, click "Save" to send the request for changes to our teammate.
- Step 3: Clients request to create a new shipping or billing address by clicking "New." Fill in all required information and click "Save" to submit the request to our teammate.
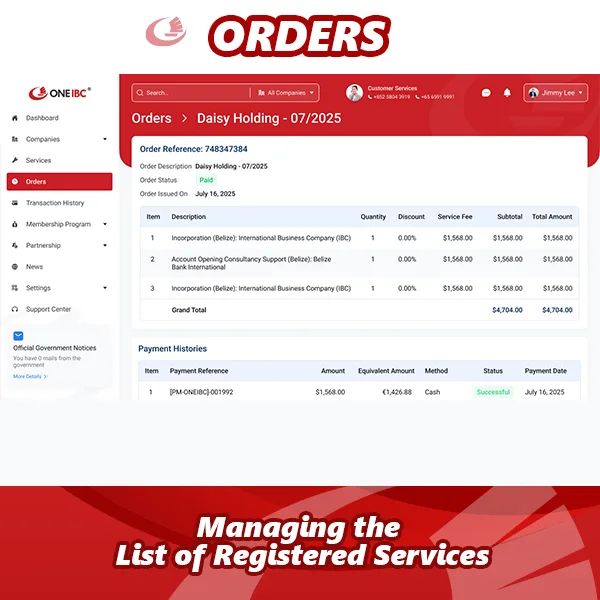
Managing the List of Registered Services
Purpose
- View the list of orders and detailed information for orders registered with One IBC's Client Portal.
- Make payments for pending orders.
View the list of orders and detailed information for orders registered with One IBC
- Step 1: clients click on "Orders" to view the list of orders registered for all their companies.
- Step 2: Click on the order to view its details.
Make payments for pending orders
- Step 1: Click "Proceed" on the order to be paid or click "Proceed to payment" in the order details to make a payment.
- Step 2: Enter the payment information and click "Proceed to Payment" to complete the payment for the order.
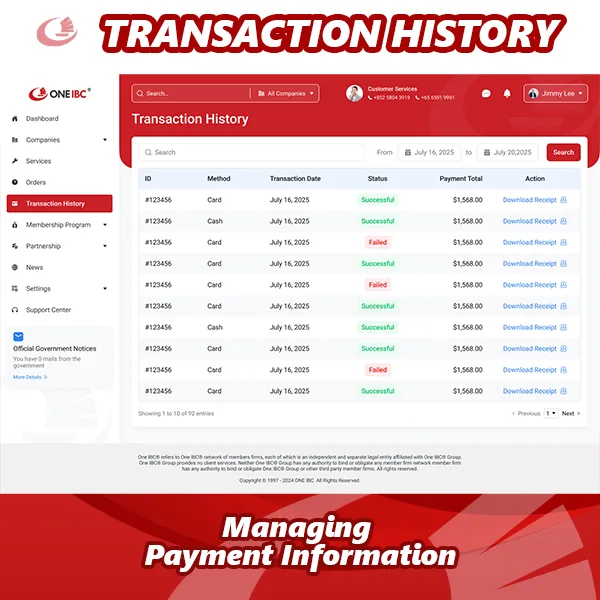
Managing Payment Information
Purpose
- View the complete list of payments and detailed payment transactions for companies registered with One IBC's Client Portal.
- Download receipts for payments.
View the complete list of payments and detailed payment transactions for companies registered with One IBC:
- Step 1: Clients click on "Transaction History" to view the list of payments made with One IBC.
- Step 2: Clients view payment details by clicking on the payment they want to see.
Download receipts for payments.
- Step 1: Click the eye icon to download the receipt.
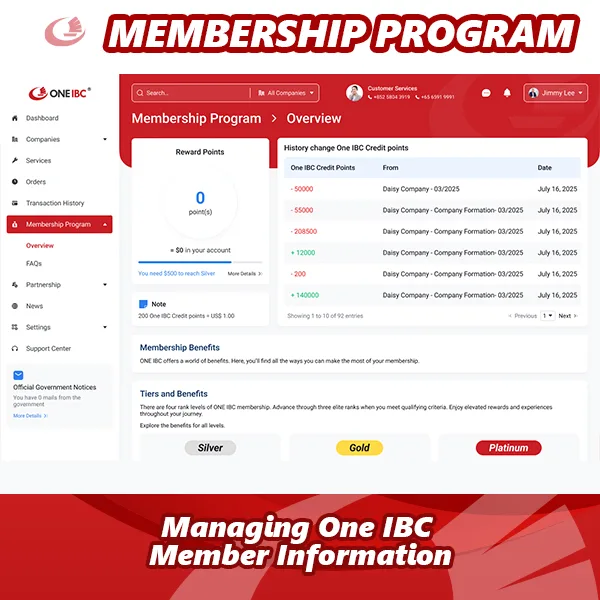
Managing One IBC Member Information
Purpose
- View membership level, total payments, and conversion points.
- View FAQs.
View membership level, total payments, and conversion points.
- Step 1: Clients click on "Membership Program" in the "Overview" section to view membership information, total One IBC Points, and the history of One IBC Points changes
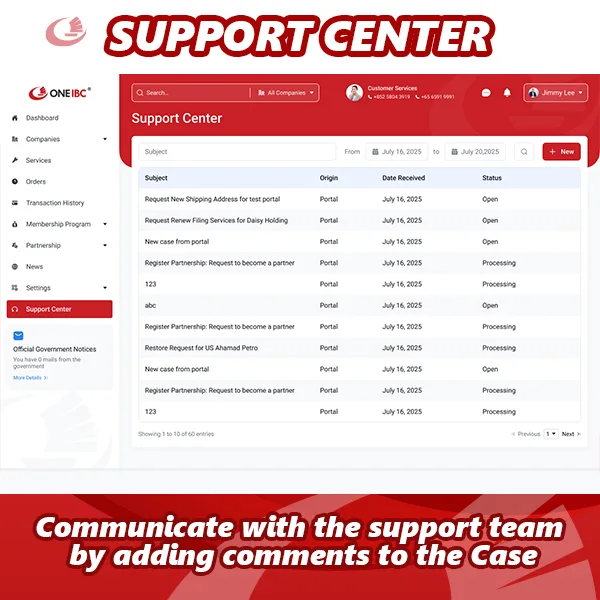
Support Center
Purpose
- View detailed information about the support requests (Cases) you have submitted.
- Communicate with the support team by adding comments to the Case.
- Close or reopen the Case when necessary.
- Create a new Case to receive quick support from our support team.
View detailed information about the support requests (Cases) you have submitted.
- Step 1: Clients click on "Support Center" to view the list of support requests submitted to our Teammate.
- Step 2: Click on the Case you want to view in detail.
Communicate with the support team by adding comments to the Case
- Step 1: Clients communicate further with our teammate by adding comments to the selected. Case and clicking "Reply" to provide additional details for the Case.
Close or reopen the Case
- Step 1: If the support request is complete, clients can proactively close the Case by clicking "Close" to submit the request to our teammate.
- Step 2: If the support request needs to be reopened, clients can proactively request to open the Case by clicking "Open" to submit the request to our teammate.
Create a new Case to receive quick support from our support team
- Step 1: Clients create a new support request (Case) by clicking "New"
- Step 2: Clients fill in the required information to request support from our teammate. Click "Create" to submit the new support request (Case)


 Processing